Showing posts with label a happpy green life. Show all posts

Tuesday, September 10, 2013

The Ahh-Mazing Powers of Natural Dryer Balls!

Natural Dryer Balls
I have to admit it, I love dryer balls!  There are so many reasons that I love them, but the #1 reason is that they leave my laundry smelling Ahhh-Mazing!!  Oh, and there are a lot of ‘green’ reasons to love them too: they minimize drying time, they don’t emit harmful toxins like dryer sheets, and they are reusable. 

Like my laundry wash, I love to try out new scents with our dryer balls, this month I am using our new scent: Sandalwood Rose.  It is such a clean, fresh and light scent and it is so yummy on our sheets!  We have just finished testing on our new dryer ball rescenting kits, and you can now scent your dryer balls at home each month to keep them smelling yummy too!

I am often asked, “How long do dryer balls last?” We have 6 that we use each time we use our dryer.  I have had them all for over two years, and there are still no signs of them ‘wearing out’.  I do rescent them often, but that is mostly because I love to have yummy scents on our laundry! 

Dryer balls work by breaking up the clumps of wet clothes, which allows them to dry more quickly.  This is especially great when you are drying heavy loads like towels, work pants or bedding!  I have found that when I am drying our bedding I have to go in and shake them out of the blankets about half way through the drying cycle to make sure that they don’t get stuck in there!  I have noticed that we are able to dry even a big heavy load in about 45 minutes instead of the hour it was taking before.  And less time in the dryer equals more money in your pocket!! 

I am also asked, “are dryer sheets really TOXIC?” and the answer is YES!!  They really are!!  There are a lot of resources out there that can give you more information on the subject – but for a quick overview…there are at least SEVEN toxic substances in dryer sheets that can affect the central nervous system.  They include: Alpha-Terpineol, Benzyl Alcohol, Camphor, Chloroform, Ethyl Acetate, Linalool and Pentane!  For more information on what these can do to your body we recommend reading The Brain Wash by Michelle Schoffro Cook {it can be found on Amazon}. 

There is no magical number for how many dryer balls to have, but I suggest at least 4 per load to really start to see an impact on the time the load takes to dry.  But if you want them just for the scenting joy, you can start with just one! 

Ready to add some dryer balls to your laundry routine?  Check out the beautiful ones we have to offer from Shelly Rose Designs! 
http://www.ahappygreenlife.com/dryerballs.html

Have A Happy Green Day!
Kristin Ward
Owner, A Happy Green Life

Wednesday, April 4, 2012

A Happy Green Life Book Club

Seedfolks by Paul Fleischman
My favorite thing to do is read! If I couldm I would spend all day lounging about reading books. I thought it would be great if could share my favorite hobby of reading with my favorite passion, being green! So we are starting A Happy Green Life Book Club! Each month we will feature a different book that is both happy and green!! This month we are going to start with a little book called Seedfolks by Paul Fleischman.

Seedfolks is an amazing little book about how a community full of people from all walks of life, come together over six lima bean seeds. This family friendly book starts when 9 year old Kim plants her lima bean seeds in a vacant trash filled lot to make a connection with her dead father. Her first neighbor investigates knowing the child is up to no good and is soon filled with regret for her quick judgment and worry for the seeds planted too early. The second neighbor vows to protect the seeds and starts his own garden, the next helps find irrigation, the next pesters the city into cleaning up the lot. 13 different characters are introduced in a series of short vignettes with each character connecting to the next and creating a neighborhood quilt sewn together with different cultures, personalities, and six little seeds.
This book is great for the whole family to sit down and read together. It teaches the importance of acceptance, diversity, community, and of course being green! Check it out at your local library or pick it up on Amazon or at your favorite book store. Let us know how you like it and if you have any suggestions for next month’s read!

-Amanda

Rustic Italian Loaf with Cranberries and Nuts


Ingredients:
Water 1 ½ cups
Extra Virgin Olive Oil 2 tablespoons
Sea Salt 2 teaspoons
Granulated sugar 1 teaspoon
Bread Flour 4 cups
Yeast 2 ½ teaspoons

In bread machine add ingredients in order listed above, making a little hole in the top to add the yeast to.  My machine has a setting for French/Italian bread – so that is what I used.  When the machine signaled to take out the paddle, I removed the loaf of bread and rolled it out lightly to add filling.


For filling – I took 1 cup of a cranberry, nuts and seeds mixture and sprinkled in over the inside of the bread.  I added 3 tablespoons of brown sugar – lightly packed over the berries and nuts.  Then I sprinkled 1 tablespoon of cinnamon over that.  Rolled back up and pinched it into a ball shape.  (I know – not a very precise direction – but it worked great!)

Then place back in the bread machine and let it do it’s magic!
The hardest direction is when it says “Bread slices best when allowed to cool” – I am a firm believe that though this may be true – Bread is more delicious when eaten warm out of the machine!  So let it cool a bit and then enjoy!  Delish!
- Kristin

Thursday, March 15, 2012

New Scent Giveaway!

We LOVE our new April 'Hoppy' Green Life Scents and we want to share them with you!
We will send an April 'Hoppy Green Life sample pack to the first 5 fans who tell us what you are doing to make your family more green!


Tuesday, March 13, 2012

A Happy Green Message Board

I love finding new ways to be green.  I am a NOTE taker – my office is covered in little notes about orders, supplies, suppliers, things I need to remember for a little while – but then they end up in the garbage.  Not the greenest way to remember things for sure!  So I was thinking – there are lots of greener ways to notes – on the computer, on the phone, on a white board.  I am a pen and paper type of gal and I like the white board option – but white boards tend to be kind of expensive.  So I was on the hunt to find a cheaper way.  I found a picture of someone using an old picture frame and cute paper to make a cute dry erase message board and it sounded like the BEST idea! 
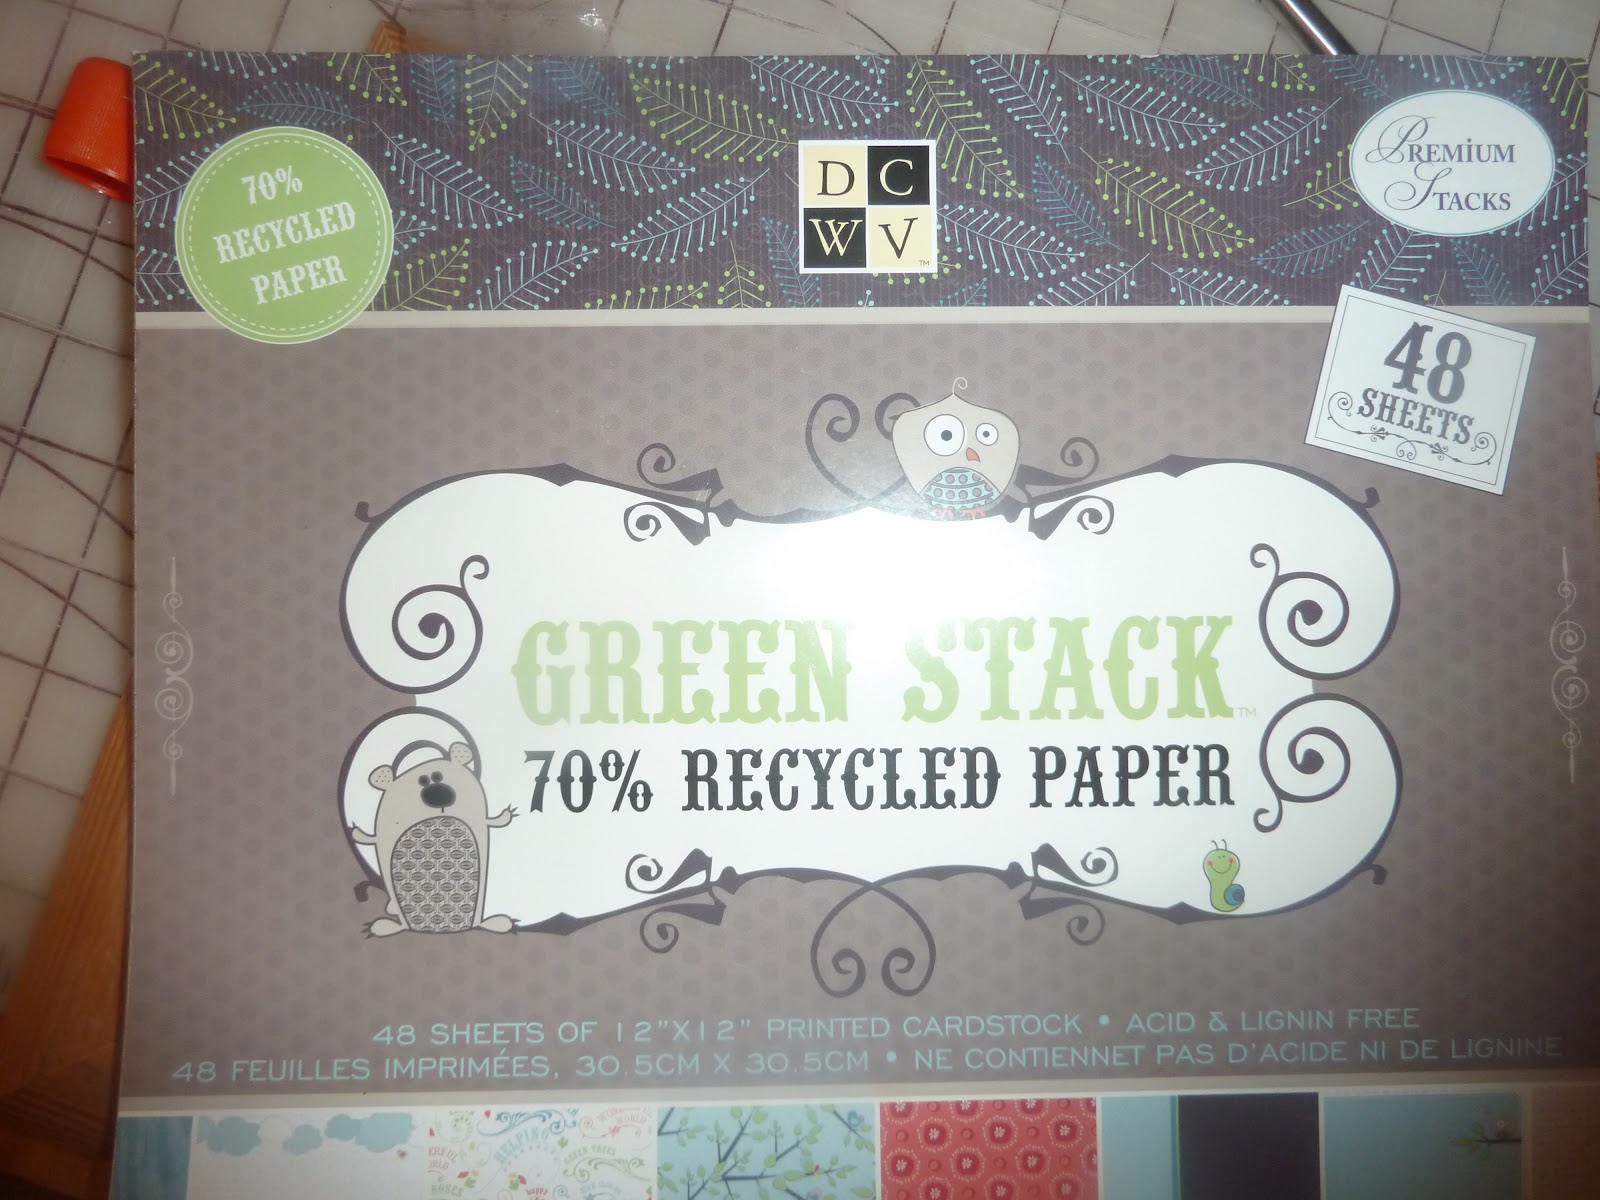
I found two frames at a garage sale for $2 and I have a stack of super cute recycled scrapbook paper – made from 70% recycled paper.  They are so easy to make.

1.       Cut the scrapbook paper to the size you need for your frame.  Use the frame inside to measure the right size – trace on the backside of the paper and then cut out. 
2.       Glue the paper to the inside of the frame cardboard.  I used a simple glue stick!
3.       Put the paper and cardboard back into the frame and close it up!
It was such a cute and easy way to make a dry erase message board.  I now have one by my desk to make notes for work and one in the kitchen to do a shopping and farmers market list or other general household notes.  If you use it to make your shopping list – simply snap a photo with your cell phone before leaving and you are set – no paper!
I hope you enjoy making your family A Happy Green Message Board!


- Kristin  

Monday, March 12, 2012

A Happy Green Backyard Garden

We have been working hard to get our Happy Green Garden up and running. We moved into our new house in December and we have been anxiously waiting for spring to start getting the backyard prepped and ready for some yummy gardening!
We started our compost almost immediately after we moved in, and we mixed in a lot of the end of fall leaves with the dirt at the bottom of our hill to let it decompose on its own to make great dirt. I love that you can make DIRT better.
This is the backyard after we moved in.
The boards along the bottom of the hill
It has been a long process and we still have a ways to go – but we are getting close to planting! We stopped by the hardware store over the weekend and picked up the boards to build some beds for planting. We are doing it this way to section off the gardening area so my 2 year old will stay out a bit and also to give us 10 more inches of dirt above ground. With the help of my dad we put in the boards – using a fairly easy process. We leveled out the ground and added the boards, putting rebar stakes behind to hold them up. The weight of the dirt inside the bed will anchor them in on the inside. Our long bed is 48’ down and about 5’ wide. We are going to plant up and down in rows to maximize our space. We also added a bed to the hill that is 8x4’, anchored in the same way.


Small bed on the hill
We ordered our dirt – it seems so strange to buy dirt – but we want to make sure that we have a good foundation for our plants. We ordered 6 yards of blended soil – it has good compost already mixed in and will provide a great amount of nutrients for our garden. It will be delivered next weekend so we can fill in the rest of the beds and get ready to plant!
The great thing about living in California is that spring comes quickly! The last frost has come and gone and it is getting close to time to get the plants in the soil. We have a rainy week in the forecast – so that will be great for the soil and then we will start planting next week!

Friday, March 2, 2012

growing your veggie scraps


cut greens from your veggie roots
I love having plants in the house; they look great, fill the house with life (and oxygen). I recently started growing plants in my kitchen from clippings of our left over grocery’s (I got this idea on pinterest). The kids love this because it is super easy to get up, they can watch them grow and it is fast. We are currently growing celery and onions, next we are going to try potatoes avocado and lemons.
add roots to jar with some water
It is super easy; first take your left over veggies clippings, in this case scallions. Cut off the green and take your white bottoms with the roots attached and place them in a cup or bowl of water. We prefer to use mason jars because they are clear so that the kids can watch the entire growing process.

Place in a sunny location and make sure to keep your roots in water. When your new veggies sprout cut and add to your dinner!!!

Happy green growing (and eating)
-Amanda

Monday, February 20, 2012

Laundry Balls!

We are a staticy family (well, our clothes are). At least once a month my poor husband finds an article of clothing stuck in his pant leg as he is walking around work (it is usually a pair of my underwear, my poor hubby is in the army so you can imagine how embarrassing it is for him to have a pair of hot pink women’s underwear sneak out of the leg of his military uniform). To combat our static problems we have always used dryer sheets. On average they would cost us about $3 a month, not too much, and they saved us total embarrassment (think pink panties and combat boots, not a good combination). Then one day I decided to look up what exactly in a dryer sheet, as you can guess it is not pretty:
Benzyl Acetate (linked to pancreatic cancer), Benzyl Alcohol (known to cause upper respiratory tract irritant), Ethanol (a chemical listed on the Environmental Protection Agency’s (EPA) Hazardous Waste list and capable of causing central nervous system disorders), A-Terpineol (another cause of  respiratory problems, including fatal edema, and central nervous system damage), Ethyl Acetate (a narcotic on the EPA’s Hazardous Waste list),  Camphor (it causes central nervous system disorders), Chloroform (a lovely neurotoxin, anesthetic and carcinogen), Linalool (a  narcotic that causes central nervous system disorders), and  Pentane (a chemical known to be harmful if inhaled).
Like I said it’s not pretty. So what is a staticky family to do? The answer is something I am very excited about, Dryer Balls!
A dryer ball is ball that when placed in your dryer with your wet clothes helps to lift and separate the clothing, reducing static and drying time, and leave your clothes soft and fluffy-without all of the horrible toxins (the technical explanation for a dryer ball is that it improves the circulation of heat and air through the wet clothing).
Dryer balls run about $10 on average and last approximately one to two years, a much better deal in the long run than those toxic dryer sheets. Even better they reduce drying time by up to 40%. This will cut the cost of your energy consumption and your electric bill!
I don’t know about you but I think that toxin free and economical are two great reasons to make the switch. There are many different dryer balls out there, our favorite are Bouncing Woolies! Not only are they free of chemicals, these are 100% natural wool. Even better they can come scented so that your clothing smells amazing when they come out of the dryer!
To purchase Bouncing Woolies check out www.bouncingwoolies.com or check out http://www.ahappygreenlife.com/ where you can find woolies scented to match your favorite laundry wash!
-Amanda

Wednesday, February 15, 2012

Bouncing Woolies

A Happy Green Life is excited to announce that we are now carrying Bouncing Woolies dryer balls! We LOVE dryer balls! They are a natural and GREEN alternative to dryer sheets and fabric softeners.


Dryer Balls are a green alternative for a couple of reasons. First, they are reusable and instead of throwing a dryer sheet away after one use, you can use a dryer ball again and again. Second, they are free of many harsh chemicals that are used in common fabric softener products. Third, they actually will reduce the time it takes to dry your clothes, reducing the amount of energy (and money) wasted! And fourth, they are made from wool, a renewable resource!


We hope that you will try them out and we know you will love them as much as we do.
Have A Happy Green Dryer with Bouncing Woolies!

Tuesday, January 31, 2012

Trashless Tuesday!

We are starting a new tradition at A Happy Green Life – Trashless Tuesday! We want to help bring awareness to the amount of garbage that the average person and family throw away EVERY day! We are hoping that we can encourage people to make conscious decisions to reduce their garbage footprint!
So…what does this mean for you? Well, take the pledge with us to have a garbage FREE day every Tuesday! Of course you can have as many garbage free days as you want – and we hope that it will open our eyes to the type of products we are using and their impact – reducing our garbage footprint everyday!
Start by thinking about the types of products you use on an average day – do you specifically buy products that can be reused or recycled? Can you up-cycle that jar into something magical for your little one? Can you use that milk jug again?
We are excited to learn about the things you learn by trying this! Please share your experiences with us!

Trashless Tuesday #1 – EPIC FAIL!

We tried, and we have to admit this is going to be harder than we thought. Today was a ‘work’ day for us. We took the kiddos and went to a local supplier to pick up some supplies. While out, lunchtime quickly approached – and we made a conscious decision to eat somewhere that we could sit down and eat – so no to-go containers. Everything was going smooth until the kiddo’s waters came in paper cups – which at least we can recycle. And then…they needed straws (they are just too little for a big kid cup) so we can reuse those right? BUT – we had leftovers and they only had Styrofoam containers – uggh…GARBAGE!
After lunch we headed to a friend’s house for a play date. On our way, we stopped for a Starbuck’s coffee. We got ourselves the reusable ‘iced’ cups so that we can reuse them every time we NEED a coffee! SCORE for trashless Tuesday! Now we only have to remember to bring them with us so we don’t have to buy one every time!
After our playdate, it was time to head back to A Happy Green Life headquarters to do some work. Kiddo’s playing outside, all is well, no garbage! But then it is dinner time – and since we had been busy all day – no motivation to cook – and of course, it is kid’s eat free night at Round Table Pizza. So we go out to eat – napkins, straws, and GARBAGE oh no…a pile of disgusting kiddo-face-wipes all over – FAIL!
What we learned: we need to create a Trashless Tuesday/ EVERY DAY to-go kit! We need to be sure to bring a bunch of our cloth wipes at all times – they are perfect for wiping faces, messes and hineys. We also need to bring containers with us to store our leftovers – genius! And reusable cups, with straws would also prevent some unnecessary garbage!
Here’s to next Tuesday and a more successful Trashless Tuesday – who’s up to join us on this adventure?

Saturday, January 28, 2012

Follow us on Twitter

We are branching out and finding new ways to spread A Happy Green Life! If you have a twitter account we would love for you to follow us. Just search for @AHappyGreenLife We have some amazing green groups that we are following, join us and help spread the word that we all need to live a more eco friendly life!

Tuesday, January 17, 2012

Lighten Up!

Did you know that the average American household has 45 light bulbs? If each of these were replaced by CFL Energy Star bulbs each household would save $180 a year!
Did you know if every home in America replaced one light bulb with a an Energy Star bulb, we would save enough energy to light 3 million homes for a year, save about $600 million in annual energy costs, and prevent 9 billion pounds of greenhouse gas emissions per year, equivalent to those from about 800,000 cars?
 Energy Star is a label that he US Environmental Protection Agency awards products that meet their strict energy efficient guidelines. Each bulb saves approximately $6 a year and $40 over its lifetime in electricity costs. This is done by using 75% less energy and by lasting 6 times longer than an old fashion incandescent light bulb. They also produce 75% less heat which can help cut down on your home cooling bill. Incandescent bulbs contain mercury which make them too toxic to throw in the trash, CFL Energy Star bulbs are required to be toxin free.
So why wait, replace some today! Take your house holds five most frequently used light fixtures and replace them or the bulbs and you can save more than $65 each year! You can use your old bulbs in places that aren’t used a lot like a closet (CLF bulbs will provide you with the most savings I places where the lights are on at least two hours a day). If you aren’t ready to make the switch try changing your bulbs to a lower wattage, you wont reap the financial benefits but you will save energy.
 When you decide to make the switch, check out Energystar.com to find stores that carry energy efficient light bulbs. If you are planning on getting rid of your old light bulbs visit EARTH911.org and type in “CFL” to find a local recycling center that will take your bulbs or head over to your local Ikea, the retailer will take your old bulbs (you can also find 3 packs of energy efficient bulbs for just $3.99).  Replacing your light bulbs is a great start in making your household green. It helps the planet and will help save you money!!
-Amanda

Sunday, January 8, 2012

The hazards of non-natural laundry detergent

Have you ever wondered what ingredients are used in your laundry detergents? If you haven’t you should, just think at least 95% of your day your body and the bodies of your family members are in contact with clothing and linens that have been soaked in detergent. So what is in laundry detergents? If you are using non-natural laundry detergents the ingredients contain carcinogenic, hormone disruptors, and other hazardous air pollutants.  
In a recent study by the University of Washington, researchers found that 25 organic compounds including seven hazardous air pollutants were released from laundry that was washed in non-natural detergent. Two of the chemicals are listed on the Environmental Protection Agency’s list of cancer causing chemicals. If you are like me who runs at least 7 loads of laundry a week you are freaking out! How does this happen? Well, laundry companies are not required by law to list their ingredients. They also aren’t regulated like other products because they are not applied directly to human skin-even though we all know they are directly touching human skin constantly.
“Optical Brighteners” are used in non-natural laundry detergents. These are synthetic chemicals that are used to make your clothes “glow” under ultraviolet light. Your clothes look bright, but they are really deteriorating. These brighteners are built to stay on your clothes; they build up and prevent your cloth diapers from absorbing and your military uniforms glow like the sun when looked at with night vision.  They also rub off onto your skin causing a rash that looks like a sun burn, and seep into waterways and build up inside fish.
Phosphates are often found in non-natural detergents.  These phosphates work as a super-charged fertilizer for algae in your washing machine-ever have stinky towels? Chances are it is due to algae growing in your washer. If you use these products they can build up in your washer in your tubes, in the pump, in the door seal! Just about everywhere! If it isn’t cleaned up your stinking clothing will have to be tossed and so will your washer.
All of these chemicals find their way into the environment and end up in the water that we drink, the soil where our veggies are growing and into the animals that we eat. They are also constantly being released into the air from your dryer vents and finding their way into our atmosphere.
So now that we know how bad laundry products can be what do we do? First, check your detergents ingredients. If it contains benzene and acetaldehyde dispose of it with your other hazardous materials, these two chemicals are cancer causing.  If it contains optical brighteners or phosphates give it the old heave-ho! If you can’t find a list of ingredients for your laundry detergent that should be a red flag, they have a reason for not showing you what it is made of. The easiest solution is to find yourself a natural laundry detergent, specifically one that isn’t afraid to tell you what it is made of. The University of Washington recommends that you don’t use more detergent than you need. Most of the time you are just washing sweat and fragrance out of your clothes, this shouldn’t require a ton of detergent. They also say to, “Wash only full loads of laundry and with cold water. Making the switch to the cold cycle will save about $60 a year on your power bill because you'll be giving the hot water heater a break."

If you are interested in making the change to natural laundry detergent (and I think you should) check out http://www.ahappygreenlife.com/ and our new laundry wash line that is safe for your clothes and skin!
-Amanda

Monday, November 7, 2011

The farm is ready!

Our farm is ready! Two weeks ago the Happy Green Life crew (and some other friends) got our garden ready for our fall crops! Like I mentioned before we started off by contacting our friend Farmer Eric and asking him what we should do. We were instructed to rototill the area that we wanted to plant, test our soil, add fertilizer if we needed it, then remove any large rocks and clumps of grass.
We had some options for how we wanted to plant the garden. My parents plant in raised box beds, they build boxes and then fill them with soil and fertilizer, this seems to be an easy way of doing it but we didn’t want to spend the money on boxes so we went a different route. The last three years I planted directly in the ground (I didn’t raise my beds), this works but I had a little trouble with flooding. So we decided to do raised soil beds. We marked out our beds, 3 feet by 18 feet, and 18 inches apart. We did this by hammering posts into the ground where the corners of the beds would be, then tying string to them, this way we had a perfect guide for our beds. Next we dug a walk way around each of the beds and threw the excess soil into the beds. By doing this we were able to raise our beds approximately 2 feet from the ground and create walkways that double as trenches for water so that our beds don’t flood.
Once we had enough soil in the beds we turned the soil with a fork and then flattened it out with the back of a rake-making sure that we didn’t pack the soil just smooth it flat. Once our beds were ready we measured out where we wanted to plant. For our brassicas (lettuce, cabbage, broccoli, cauliflower and kale) we staggered our plants between three rows 8 inches apart. This leaves them enough room for a medium to large plant.
For our root plants, carrots, beets, radishes we planted in straight rows dropping our seed throughout. Once they have begun to sprout we will thin the rows out allowing the plants enough room to grow approximately 2 inches (some plants up to 8 inches, check the seed pack to see how much space they need).
We have seven beds left, five will be planted with wheat and peas and two will go to herbs (our tomatoes are currently in them). We will be “nicking” the sweat peas outer shell so that they can absorb more water and then planting them 2 inches apart. For our wheat we will be spreading it out across the beds (no rows for this stuff). We will have enough wheat to make approximately 40 loaves of bread!
After everything was planted it was time to water. Farmer Eric taught us to check our soil by taking a handful and clumping it together, if it clumps into a ball then it has moisture, if you are unable to break it up in your hand it has too much moisture and you should hold off on watering. We are to water our veggies once a week for about an hour.
Once our veggies are grown we will be rotating our plants around so that we can add nutrients back to the soil. It will take approximately 60 days to see some veggies. In the meantime we are growing some veggies from seed in the house so that they are ready to plant after the first harvest. We will keep you updated on our farm, wish us luck!